Winterization fluid

The friendliest place on the web for anyone who enjoys boating.
If you have answers, please help by responding to the unanswered posts.
I see, the transom shower on my boat is the washdown spigot

Here is what they look like from inside. The 5 hoses from left to right I'll number them 1 to 5

Hose 1 is the dock water inlet
Hose 2 is the shower head (water flows up)
Hose 3 is cold water supply
Hose 4 is the same hose as 2, it is mixed hot and cold water (water flows down)
Hose 5 is hot water supply

It looks the hot water tank needs to be drained or bypassed for the compressor method to work.

Screenshot_2023-11-23-19-45-59-39_92460851df6f172a4592fca41cc2d2e6.jpg


This is the view for a lower portion

Screenshot_2023-11-23-19-46-23-71_92460851df6f172a4592fca41cc2d2e6.jpg

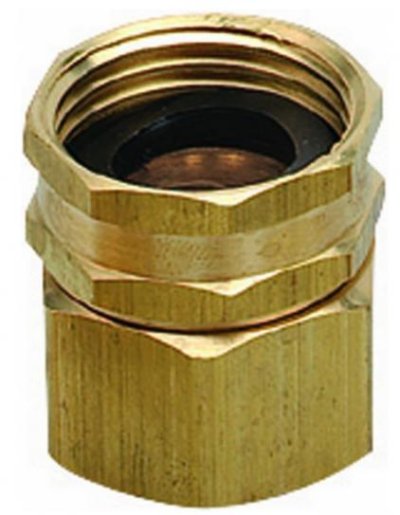
I think I mis-spoke earlier. Our dockwater inlet is female garden hose threads. So our dockwater hose attaches -- female GHT to the dockside spigot, male GHT to our boat inlet.

And it happens right next to it, we have a washdown spigot with male GHT.

I can't tell what yours are, from the pics. It would be not uncommon to have an inlet and then a separate outlet too, latter for washdown or some such... like our setup... so if you have two "things" in close proximity you may have something like that too.

And then they may be attached on the same cold water hose line... or they may be on separate lines.

If they're on the same line, it probably won't matter which you use to attach a compressor, but... the dockwater inlet could well have a pressure regulator on it... and the washdown spigot likely won't.

-Chris
 

Attachments

  • Screenshot_2023-11-23-19-45-52-64_92460851df6f172a4592fca41cc2d2e6.jpg
    Screenshot_2023-11-23-19-45-52-64_92460851df6f172a4592fca41cc2d2e6.jpg
    47.1 KB · Views: 24
I see, the transom shower on my boat is the washdown spigot

Here is what they look like from inside. The 5 hoses from left to right I'll number them 1 to 5

Hose 1 is the dock water inlet
Hose 2 is the shower head (water flows up)
Hose 3 is cold water supply
Hose 4 is the same hose as 2, it is mixed hot and cold water (water flows down)
Hose 5 is hot water supply

It looks the hot water tank needs to be drained or bypassed for the compressor method to work.

I'd expect you'd likely have a more easily accessible place to attach a dockwater inlet hose. In the cockpit, near the transom, whatever... and then that may be connected in turn to your hose #1?

Hoses 3 and 5 seem to have both blue (cold) and red (hot) tracers. So maybe the tracers aren't relevant?

I'd not expect any hose like those to have hot and cold water already mixed. I'd have expected that function to happen at the sink/shower controls.

Our transom shower, not the same as our transom washdown, actually has a handheld wand shower head. I didn't mention it before, but ours is also on the same line as the dockwater inlet, the transom washdown spigot, and an engine room washdown spigot (also not mentioned previously).

Yes, and I've found draining the water heater the easiest, partly because that way I haven't had to mess with installing a bypass....

-Chris
 
If the water supply hose to the hot water tank has a valve , closing the valve will bypass the hot water tank. The best location is shown in pic 2, but there is not enough space to install a valve. So im thinking to add a blue valve to the tank's water inlet, at the same relative location of the red valve - hot water shut off. Is the parts universally available and installation easy?


IMG_20231126_143225.jpg

IMG_20231126_143406.jpg

I'd expect you'd likely have a more easily accessible place to attach a dockwater inlet hose. In the cockpit, near the transom, whatever... and then that may be connected in turn to your hose #1?

Hoses 3 and 5 seem to have both blue (cold) and red (hot) tracers. So maybe the tracers aren't relevant?

I'd not expect any hose like those to have hot and cold water already mixed. I'd have expected that function to happen at the sink/shower controls.

Our transom shower, not the same as our transom washdown, actually has a handheld wand shower head. I didn't mention it before, but ours is also on the same line as the dockwater inlet, the transom washdown spigot, and an engine room washdown spigot (also not mentioned previously).

Yes, and I've found draining the water heater the easiest, partly because that way I haven't had to mess with installing a bypass....

-Chris
 
The flare nuts are larger than they look in the photo. 11/16 wrench is still too small. Needle nose plier and adjustable wrench do not grab well. With a caliper, the nut size is 22mm, or 7/8in.

If the nut can be loosened, is it easy to find the right sized plug for the T?

IMG20231126154737.jpg


No, that's a basin wrench. Get some tubing wrenches. Your pics show a lot of TEEs. Hold the TEE with a crescent wrench.


If you're going to cut and flare you MUST use a tubing cutter. The end must be square and no burrs. You'll need a flaring tool to make the new flare. You should be able to find kits with the tools needed. Don't cheap out, get good tools. Especially important when working in tight places


Get some new tubing and practice before you cut. It's not a tough skill to learn. Youtube probably has some good how to videos. Then consider the old tubing will be harder and more brittle. It may require annealing. Again, Youtube university will help you.


Another thing to look into is Shark Bite fittings. I've not used them. Read up, follow the manufacturer's directions if you go that way.
 
Not sure how you are using needle nose pliers on a flare nut? With care a crescent can be used on the flare nut. Tubing is sized by OD, that's the size you need to search for. My guess is you've got 1/2" tubing. And most likely a 37 degree flare. A bit of online searching should produce results in nearby hardware or plumbing supply stores. Home Depot seems to carry them 1/2 in. Flare Brass Plug Fitting

The flare plug does not go on the tee. It goes in the flare nut against the flared tubing.
The flare nuts are larger than they look in the photo. 11/16 wrench is still too small. Needle nose plier and adjustable wrench do not grab well. With a caliper, the nut size is 22mm, or 7/8in.

If the nut can be loosened, is it easy to find the right sized plug for the T?

View attachment 143832
 
The two flare nuts that the blue arrow pointed to are what I intend to disconnect. The lines to the left of the nuts send water to aft cabin head shower , sundeck and transom shower. It's more important to plug the open end of the T after the disconnection, correct? I guess there should be a "flare nut plug" that can plug the T

IMG_20231126_185054.jpg


Not sure how you are using needle nose pliers on a flare nut? With care a crescent can be used on the flare nut. Tubing is sized by OD, that's the size you need to search for. My guess is you've got 1/2" tubing. And most likely a 37 degree flare. A bit of online searching should produce results in nearby hardware or plumbing supply stores. Home Depot seems to carry them 1/2 in. Flare Brass Plug Fitting

The flare plug does not go on the tee. It goes in the flare nut against the flared tubing.
 
Last edited:
If the water supply hose to the hot water tank has a valve , closing the valve will bypass the hot water tank. The best location is shown in pic 2, but there is not enough space to install a valve. So im thinking to add a blue valve to the tank's water inlet, at the same relative location of the red valve - hot water shut off. Is the parts universally available and installation easy?


Don't know about all that. It was so simple to just drain our water heater, and then blow some more out via the drain, that I didn't mess with designing a bypass.

In fact, I left a hose attached to the tank drain (previous boat)... so it was easier to reach... and then coupled a longer hose to that one to lead the drainage overboard. I just had to briefly get near enough to the drain valve to open it, then close it later before blowing out the rest of the system.

-Chris
 
If you are using air to blow out the system there is no need for a bypass. The bypass is needed so you don’t have to fill the hot water tank with pink before it starts to get pushed through the hot water system.
 
I also had a sp135 and genset I winterized for 10 yrs here in Michigan. Use the Good stuff (ie. Propylene). Blue in color as I remember. I would first drain the Aqualift muffler, then run approximately 3gal through the main engine while having someone watch the exhaust for the blue color. That was sufficient to take care of the three heat exchangers (ie. engine coolant, transmission cooler and oil cooler). The gen set may vary but my 8Kw took 1.5 gal for it's heat exchanger (same technique). Good Luck
 
We used to winterize our last boat here in Michigan. It is a false sense of economy to try and use the minimum amount of antifreeze. If it gets diluted and the engine freezes and cracks the block, what would you give to have used a couple of gallons more antifreeze and saved the engine? Having said that the best way to ensure that you have protected the various equipment is to test the output of the items with a refractometer. It will show you what the actual protection is after it comes out of the equipment. But you do need to use either the -100 or -200 antifreeze. The -60 would not read out on my reflectometer so I wouldn’t use it. One caution I learned is when people say watch for color coming out of the exhaust, or whatever, and you are good to go. When I would test the color coming out, at the first color it would test as being good down to +20 degrees, not - 20 or even zero. As I added more antifreeze the protection point would get down below zero, actually I would look for -20 just in case we have a bad winter. I would check each and every outlet for proper temperature protection, except the inside of the head and there I would just run a bunch more antifreeze. I always erred on the side of caution since the consequences of using too little antifreeze can be a huge expense or even just a lot of work repairing things like broken pipes, the lowest cost items to freeze. The expensive things like engines are way worse. I never had any freeze issues and I never regretted using too much antifreeze.
 
Chris, here is the strainers on my boat, are they groco style or have replacement lid to connect to a transfer pump?

The strainer shared by two ac units at aft cabin and main salon

IMG_20231127_212842.jpg

Engine strainer

IMG20231126154031.jpg

Genny strainer

IMG20231126153856.jpg

When we do winterize, we use compressed air for the fresh water system.

1) Open the water heater drain, let it "empty".
- Our water heater maker manual says if residual freezes, it wont hurt anything; steel tank will be fine. (Yours might be different.)
2) Attach compressor to dock water inlet, blow away.
- Don't bother to exceed rated PSI of your dock water pressure regulator
3) When substantially empty, close the water heater drain.
4) Open and close hot/cold spigots/faucets back and forth, furthest to closest, closest to furthest... a few times... until all you get from each is a mist
5) Let the system rest a bit (have a beer or whatever)
6) Restart the compressor and repeat step 4 a few more times
7) End by opening all spigots/faucets, so the system it totally open, and let the mist blow from them all a bit more

Don't forget interior and cockpit showers, exterior washdowns, anchor washdown, etc etc etc

When we're serious about it, after all that... we disconnnect the freshwater pump inlet and outlet, use the pump itself to draw an ounce or two of pink through (and then out of) the pump. (You may not want/need to do this step if living aboard.)

WE DO NOT INJECT POTABLE (PINK) ANTIFREEZE INTO OUR FRESHWATER SYSTEM. (It would take about 3 years (hyperbole) of flushing to clean that out...)

If it helps, when we do the AC systems, we use a transfer pump to inject pink. Happens we use Groco fittings, or TRAC makes replacement lids for Groco strainers, to attach a garden hose from transfer pump. The transfer pump will force pink right through our AC raw water pump and thenceward (?) throughout the rest of the system.

Turn pump on, feed it with pink, watch pink outflow from each AC-related thru-hull. Takes about 10 minutes just for the winterizing part.... although I add a bit more time because I also clean the strainer and put in a clean basket at the same time.

-Chris
 
My boat has single screw Ford Lehman sp135 6 cylinder and a westerbeke 6 kw 6.0BCD Genny. I also plan to add some AF to the rear water tank. How much of this winterization fluid so I need?

I saw the west marine antifreeze is sold twice as expensive, so there should be a reason?

Typically the more expensive stuff is straight propylene glycol with NO alcohol. That is important as alcohol dries all rubber seals in your heads and pumps. I only use cheap stuff in the bilge or drains with no rubber seals. You need to check the labels I have even found the more expensive stuff had alcohol. So I surf by Home Depots, Walmarts and even marinas with Chandlery looking. Sometimes I have found the pure stuff cheap as most folks don't understand the difference. I won't buy from Amazon as if it arrives with alcohol in it its useless unless you like a lot of rubber seal work.
 
Chris, here is the strainers on my boat, are they groco style or have replacement lid to connect to a transfer pump?

Those are not Groco strainers, which have a clear spin-off lid. See here:

https://www.groco.net/products/raw-water-strainers/basket-strainer/arg-series

TRAC is the one that makes a replacement spin-off lid, and it in turn incorporates an additional garden hose fitting.

Yours might be by Buck Alconquin, now named Hyrdasearch. If so, decent quality... and no need to change.

We inserted Groco service adapters in our AC lines. See here:

https://www.groco.net/products/valves-seacocks/accessories/ssc-series-service-adaptor

https://www.groco.net/products/valves-seacocks/accessories/sscv-series-service-adaptor

Once, we inserted it just after the seacock and before the strainer, on this boat just after the strainer and before the pump. Latter is easier to reach, in our current case...

Or a three-way T with a valve on it could probably be adapted to the concept.

-Chris
 
Got it, the groco service adapter or a 3 way T can be used as an alternative to a replacement lid. Why an inline becomes required when the service adapter is added after strainer?

Screenshot_2023-11-28-15-57-06-72_40deb401b9ffe8e1df2f1cc5ba480b12.jpg

Those are not Groco strainers, which have a clear spin-off lid. See here:

https://www.groco.net/products/raw-water-strainers/basket-strainer/arg-series

TRAC is the one that makes a replacement spin-off lid, and it in turn incorporates an additional garden hose fitting.

Yours might be by Buck Alconquin, now named Hyrdasearch. If so, decent quality... and no need to change.

We inserted Groco service adapters in our AC lines. See here:

https://www.groco.net/products/valves-seacocks/accessories/ssc-series-service-adaptor

https://www.groco.net/products/valves-seacocks/accessories/sscv-series-service-adaptor

Once, we inserted it just after the seacock and before the strainer, on this boat just after the strainer and before the pump. Latter is easier to reach, in our current case...

Or a three-way T with a valve on it could probably be adapted to the concept.

-Chris
 
Got it, the groco service adapter or a 3 way T can be used as an alternative to a replacement lid. Why an inline becomes required when the service adapter is added after strainer?

??

I don't think I said anything about anything else in line after the service adapter or T. At least I didn't mean to.

Or do you mean the Groco ref to inline valve? Think that's if you want an emergency pump function...

That said, a shut-off valve somewhere on the pump side of the service adapter could probably make the process slightly less messy.... simply be controlling all the remaining sea water between SSC and pump. Which of course wants to drain once you remove the adapter plug to attach the service hose. I haven't done that myself. Yet. The process doesn't spill much, and a wet vac sorts it easily enough.

Note that if you put the service adapter before the strainer, the process automatically fills the strainer with AF too. If the service adapter is after the strainer, you may need to do a little extra work just to be sure the strainer itself is properly protected. Or at least check through the site bowl with a light to be sure you've got enough pink in there.

-Chris
 
Last edited:
If you read the description of SSC:

Add SSC to the top of a seacock or raw water strainer outlet (in-line valve required - see SSCV series)

It seems to say an in line valve is required if you add this adapter to the top of the strainer, an in line valve is not required if it is added to the top of the seacock.


??

I don't think I said anything about anything else in line after the service adapter or T. At least I didn't mean to.

Or do you mean the Groco ref to inline valve? Think that's if you want an emergency pump function...

That said, a shut-off valve somewhere on the pump side of the service adapter could probably make the process slightly less messy.... simply be controlling all the remaining sea water between SSC and pump. Which of course wants to drain once you remove the adapter plug to attach the service hose. I haven't done that myself. Yet. The process doesn't spill much, and a wet vac sorts it easily enough.

Note that if you put the service adapter before the strainer, the process automatically fills the strainer with AF too. If the service adapter is after the strainer, you may need to do a little extra work just to be sure the strainer itself is properly protected. Or at least check through the site bowl with a light to be sure you've got enough pink in there.

-Chris
 
If you read the description of SSC:

Add SSC to the top of a seacock or raw water strainer outlet (in-line valve required - see SSCV series) to allow instant emergency bilge pumping.

It seems to say an in line valve is required if you add this adapter to the top of the strainer, an in line valve is not required if it is added to the top of the seacock.

I think if you take their complete sentence into account, they're on about also using the adapter for emergency dewatering.

I dunno why they suggest that, though. Would have thought closing the seacock would have the same effect.

FWIW, we don't have an extra valve on our AC systems, and the adapters are after the strainers. Works fine.

-Chris
 
Does this transfer pump work to pump AF through the line system?


I think if you take their complete sentence into account, they're on about also using the adapter for emergency dewatering.

I dunno why they suggest that, though. Would have thought closing the seacock would have the same effect.

FWIW, we don't have an extra valve on our AC systems, and the adapters are after the strainers. Works fine.

-Chris
 
flare nut cap or flare brass plug does not need teflon or sealant, and the standard is finger tight plus 1/3 turn using wrench, just want to confirm if this is correct?

does this adapter connect a flare nut (the hex end) to a garden hose?


They are called flare nut caps. Home Depot, Lowe’s or any hardware store will have them.
 
Flare fittings do not want sealant. They go together dry. Only as tight as needed to stop leaks.

That fitting won't work. Start with flare to male pipe thread. End with female pipe thread to garden hose. Other fittings may be needed in between depending upon sizes.
flare nut cap or flare brass plug does not need teflon or sealant, and the standard is finger tight plus 1/3 turn using wrench, just want to confirm if this is correct?

does this adapter connect a flare nut (the hex end) to a garden hose?
 
the idea is to connect the flare nut hex end to a garden hose for pumping AF to the isolated lines. that adapter is already 1/2" flare to male iron pipe (MIP) thread, but still does not work?

Flare fittings do not want sealant. They go together dry. Only as tight as needed to stop leaks.

That fitting won't work. Start with flare to male pipe thread. End with female pipe thread to garden hose. Other fittings may be needed in between depending upon sizes.
 
The adapter in your post is not a flare fitting. You need fittings like these. If you can find fittings with the same thread size no intermediate fittings will be needed. Maybe the other gender on the garden hose fitting, depends on which end of the garden hose you are connecting.


the idea is to connect the flare nut hex end to a garden hose for pumping AF to the isolated lines. that adapter is already 1/2" flare to male iron pipe (MIP) thread, but still does not work?
 

Attachments

  • Flare to mpt.jpg
    Flare to mpt.jpg
    29.8 KB · Views: 25
  • fpt to gh.jpg
    fpt to gh.jpg
    27.1 KB · Views: 25
does this adapter function as both parts in your post coupled together? and the garden hose can directly thread onto the female side?

The adapter in your post is not a flare fitting. You need fittings like these. If you can find fittings with the same thread size no intermediate fittings will be needed. Maybe the other gender on the garden hose fitting, depends on which end of the garden hose you are connecting.
 
Correct, no tape or sealant on a flare nut cap.

The adapter in the link has both MHT and MIP threads and are not compatible with flare fittings.
 
i see you are referring to this one

I bought this one from ACE. its 3/4 famale end has FPT tapered thread.

For short time AF pumping purpose, does it damage the garden hose connector?


Correct, no tape or sealant on a flare nut cap.

The adapter in the link has both MHT and MIP threads and are not compatible with flare fittings.
 
I purchased this flare brass cap and this flare brass plug.


both specified 45 degree flare. is it compatible if the existing nut is not 45 degree?


Not sure how you are using needle nose pliers on a flare nut? With care a crescent can be used on the flare nut. Tubing is sized by OD, that's the size you need to search for. My guess is you've got 1/2" tubing. And most likely a 37 degree flare. A bit of online searching should produce results in nearby hardware or plumbing supply stores. Home Depot seems to carry them 1/2 in. Flare Brass Plug Fitting

The flare plug does not go on the tee. It goes in the flare nut against the flared tubing.
 
Last edited:
A 15/16" wrench fits these nuts

What is the loosen direction? I tested both directions but it's tight, even though I already soaked the nuts with wd40 many times.

If it does not budge, any method to loosen without damaging it?

IMG20231207224146.jpg


That looks like it will work, all in one fitting.
 
Back
Top Bottom