Upper Rubbing Strake Woody GB42

The friendliest place on the web for anyone who enjoys boating.
If you have answers, please help by responding to the unanswered posts.

Forty_Two

Member
Joined
Feb 5, 2021
Messages
7
Vessel Make
GB42CL #74 1969 Owned since 1987
Can anyone confirm the construction under the upper rubbing strake?

My assumption is its screwed directly over the top hull plank with the sub deck ply & teak deck extending over the top plank to it's top outside edge with the top edge of the rubbing strake level with the teak deck top surface.

Thanks,
Paul
 
Last edited:
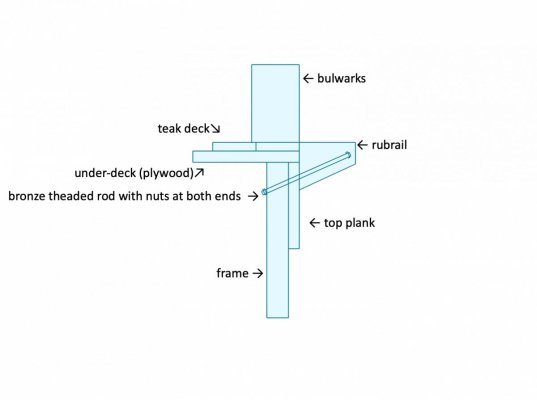
In my boat, the rub rail is attached to the hull with bronze threaded rods and nuts. See diagram below.

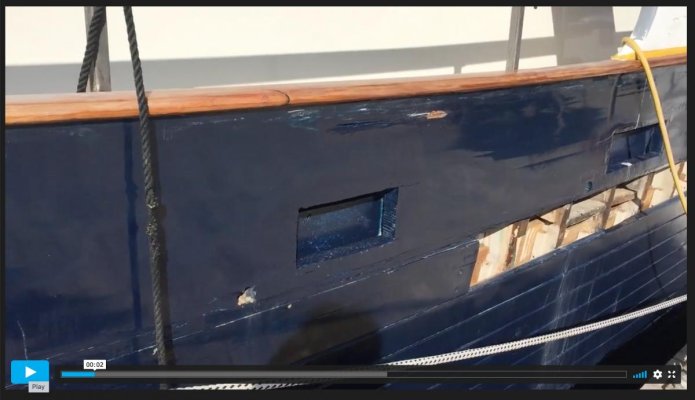
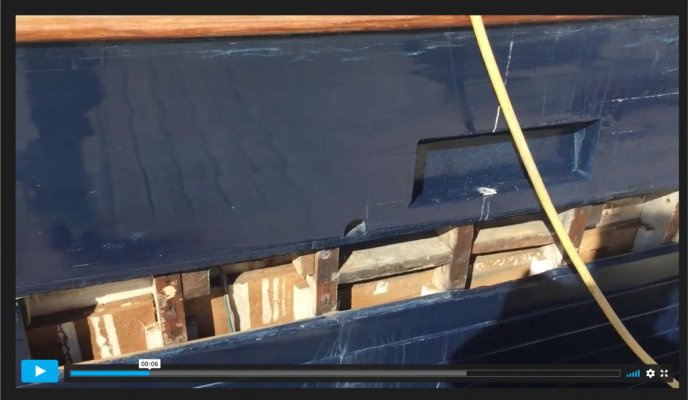
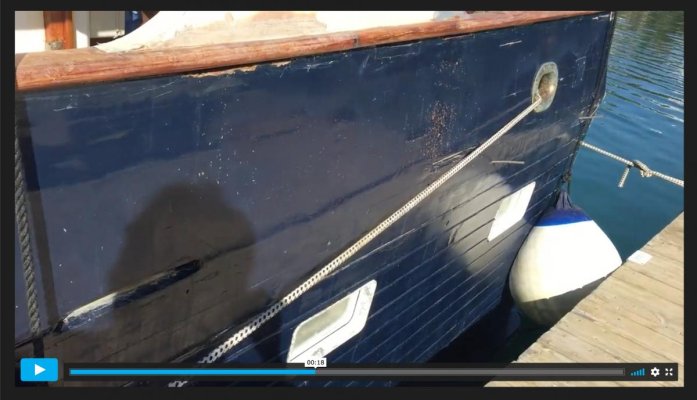
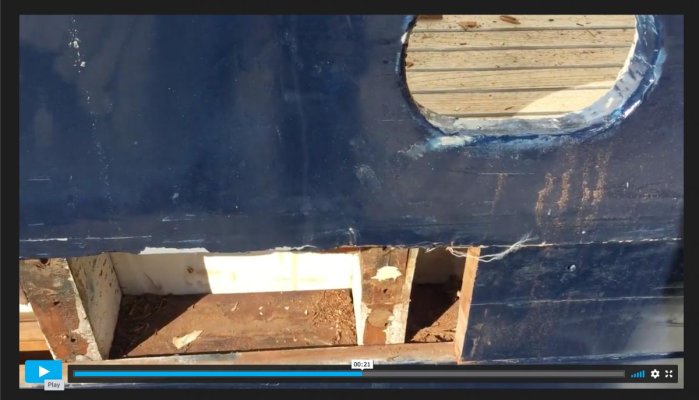
As it happens, I am in the process of replacing a plank under the rub rail so I also enclose a link to a video where you can see what is under the plank and get an idea of how the rub rail is attached.

You can see three holes in each frame. the top hole is where the bronze threaded rod went through and the other two are from the plank fasteners. There was a actually only a threaded rod every other frame. In the other frames there's was a long bronze screw from the rub rail to the frame.

(In the video, towards the stern, you can se two threaded rods coming through the top plank. These are stainless steel threaded rods that seem to have replaced the original bronze ones in some prior repair.)

https://vimeo.com/user15085947/review/509188819/77c78b74ed

As I had no access to the nuts on the inside I had to cut-off the bronze rods with a Fein tool. I plan to re-fastened the rub rail with long bolts threaded on to the frames.
 

Attachments

  • Picture 1.jpg
    Picture 1.jpg
    41.6 KB · Views: 24
Last edited:
In my boat, the rub rail is attached to the hull with bronze threaded rods and nuts. See diagram below.
As it happens, I am in the process of replacing a plank under the rub rail so I also enclose a link to a video where you can see what is under the plank and get an idea of how the rub rail is attached.
You can see three holes in each frame. the top hole is where the bronze threaded rod went through and the other two are from the plank fasteners. There was a actually only a threaded rod every other frame. In the other frames there's was a long bronze screw from the rub rail to the frame.

(In the video, towards the stern, you can se two threaded rods coming through the top plank. These are stainless steel threaded rods that seem to have replaced the original bronze ones in some prior repair.)

https://vimeo.com/user15085947/review/509188819/77c78b74ed

As I had no access to the nuts on the inside I had to cut-off the bronze rods with a Fein tool. I plan to re-fastened the rub rail with long bolts threaded on to the frames.

Thank you, the drawing is brilliant & as i had expected. So good to have it confirmed.

Did you remove just a portion of the rub rail?

The video link didn't work by the way, says not found. Would definitely like to see that.

It's a relief to have a place to ask for help again after the demise of the GB Owners forum :)

Thanks, Paul
 
Yes, I removed around five or six metres on the port side. I noticed the top plank under the rub rail was partly rotted. Rain water seems to have seeped-in in as the top joint between rub rail and the hull had failed (this should have been easy enough to prevent with preventive maintenance and a bit of seam compound:facepalm:)

As it turned out the board towards the stern was fine so I only had to replace around three meters of plank.

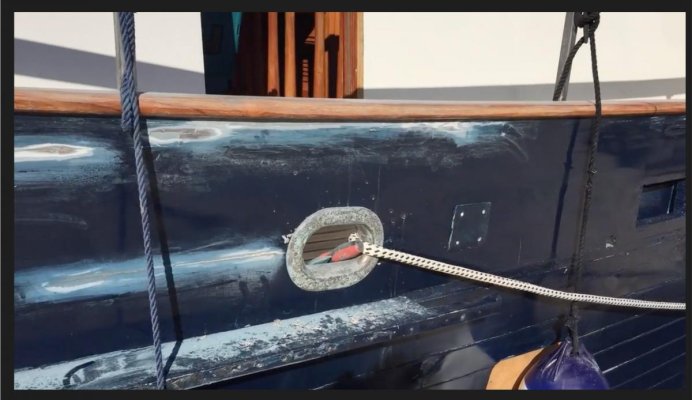
The video link works for me but I enclose some stills from it just in case:
 

Attachments

  • 1.jpg
    1.jpg
    85.6 KB · Views: 29
  • 2.jpg
    2.jpg
    72 KB · Views: 30
  • 3.jpg
    3.jpg
    76.4 KB · Views: 26
  • 4.jpg
    4.jpg
    86.3 KB · Views: 29
  • 5.jpg
    5.jpg
    85.4 KB · Views: 26
Last edited:
Thank you for the stills, that's all very helpful :)

Can't make the video work, maybe i would need a vimeo log in to make it work. Just says "sorry couldn't find that page"
 
That works, thanks again, stay safe.
 
Back
Top Bottom