- Joined
- Apr 15, 2008
- Messages
- 13,737
- Location
- California Delta
- Vessel Name
- FlyWright
- Vessel Make
- 1977 Marshall Californian 34 LRC
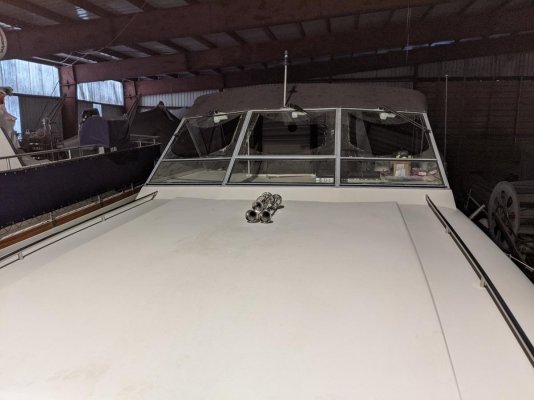
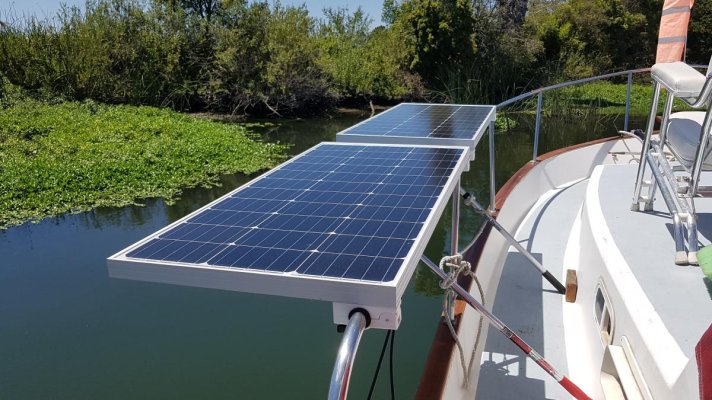
Here are some shots from last summer during my install and testing for optimum solar system form and function. I have 2x100W adjustable panels on the port rail and 2x100w stationary panels on the foredeck (temporarily). I don't have the numbers with me but they ran similar to Frank's findings. Adjusted panels with low sun makes a difference. If you're gonna lay them flat, just buy more panels. I made some adjustable struts out of PVC that seem to work OK for now. I expect that as I gain experience with it, they may be modified for better form and function.
In these photos, I was still working out the adjustable strut vs. fixed panel ideas so you can see the prototype supports I was then using. Ultimately, I mounted the other 200W on the stbd rail and have the installation Phase I completed. Phase II will involve rerouting the cabling for shorter runs that minimize runs along the fwd rails.
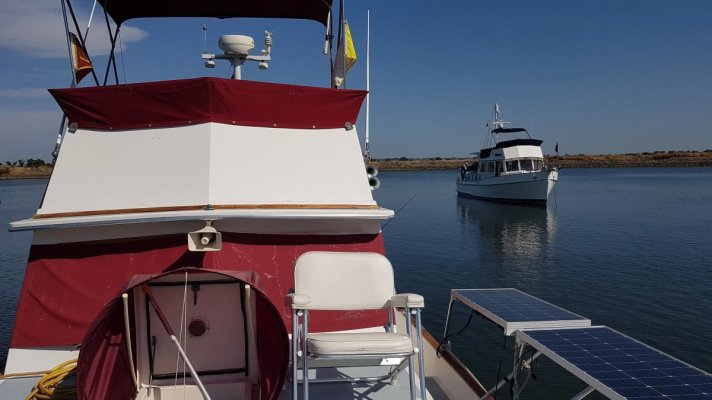
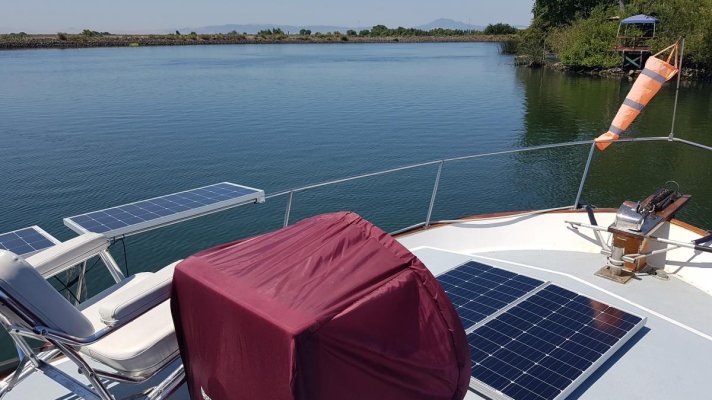
I used these rail mounts from Sea Dog...2 per panel. Adjacent panels are fixed together so they move in unison as one panel so only one adjustment needed per side, not two. They can be easily removed when conditions warrant but for normal docking, they lay down vertically outside and against the rail stanchions. If I need to, I can also flip them to vertically inside the rail stanchions.

If I had mounted the panels at the mid-width point, I wouldn't need the struts but the panels would protrude into the side deck walking area. I just knew if I did that, I'd end up with much more boat rash than normal. When they're 'deployed', they look a bit like wings for FlyWright. Maybe they need flamingo pink wingtips, huh?
I think my MPPT controller can handle another 100W if I need to expand but so far, it doesn't look like it'll be needed unless I want to run the second fridge full time in the summer.
IMO, I think it's much better to build your system to your specs with quality components and not rely on the kits put forth pushing last year's panels and lesser controllers. I found Renogy to be easy to work with. So far, I'm very pleased with the system that came in under budget at 1 BU. My unexpectedly favorite part is the BlueTooth app on my tablet or phone that allows me to monitor all parameters and history within BT range.
Like Frank said, electrical budget and conservation in advance is critical. Years ago, I shifted to LED throughout and fridge upgrade and ventilation/insulation mods with the help of a NovaKool engineer.
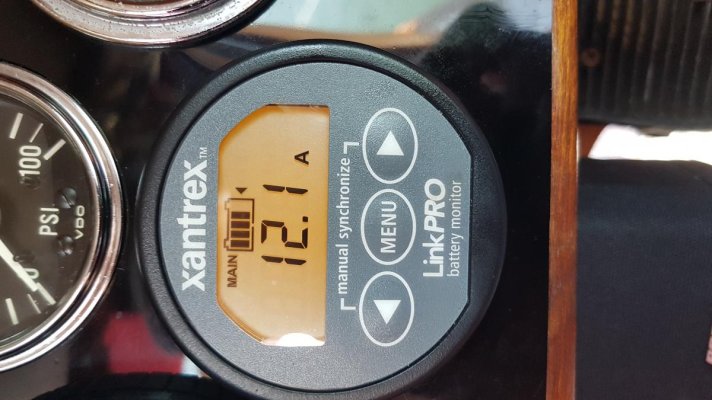
My recommendation would be to get a good handle on your electrical system before adding solar. The best place to start is with a State Of Charge (SOC) meter. My electrical system was optimized years ago to include upgrading all large cables, 6x220AH golf cart batteries and a Balmar 120A alternator (with cooling fan) on the stbd engine. Also, I carry a Honda eu2000i for electric cooking purposes mostly.
I rely on my SOC meter over the Renogy value on the tablet since the solar does not monitor other charging sources and doesn't know the battery capacity. It seems to be only voltage related.
I'm looking forward to my first full summer with solar in 2021. I'm thinking about keeping a ledger so I can track its performance throughout the months afloat. If I actually follow through with that, I'll share it here on TF.
In these photos, I was still working out the adjustable strut vs. fixed panel ideas so you can see the prototype supports I was then using. Ultimately, I mounted the other 200W on the stbd rail and have the installation Phase I completed. Phase II will involve rerouting the cabling for shorter runs that minimize runs along the fwd rails.
I used these rail mounts from Sea Dog...2 per panel. Adjacent panels are fixed together so they move in unison as one panel so only one adjustment needed per side, not two. They can be easily removed when conditions warrant but for normal docking, they lay down vertically outside and against the rail stanchions. If I need to, I can also flip them to vertically inside the rail stanchions.
If I had mounted the panels at the mid-width point, I wouldn't need the struts but the panels would protrude into the side deck walking area. I just knew if I did that, I'd end up with much more boat rash than normal. When they're 'deployed', they look a bit like wings for FlyWright. Maybe they need flamingo pink wingtips, huh?
I think my MPPT controller can handle another 100W if I need to expand but so far, it doesn't look like it'll be needed unless I want to run the second fridge full time in the summer.
IMO, I think it's much better to build your system to your specs with quality components and not rely on the kits put forth pushing last year's panels and lesser controllers. I found Renogy to be easy to work with. So far, I'm very pleased with the system that came in under budget at 1 BU. My unexpectedly favorite part is the BlueTooth app on my tablet or phone that allows me to monitor all parameters and history within BT range.
Like Frank said, electrical budget and conservation in advance is critical. Years ago, I shifted to LED throughout and fridge upgrade and ventilation/insulation mods with the help of a NovaKool engineer.
My recommendation would be to get a good handle on your electrical system before adding solar. The best place to start is with a State Of Charge (SOC) meter. My electrical system was optimized years ago to include upgrading all large cables, 6x220AH golf cart batteries and a Balmar 120A alternator (with cooling fan) on the stbd engine. Also, I carry a Honda eu2000i for electric cooking purposes mostly.
I rely on my SOC meter over the Renogy value on the tablet since the solar does not monitor other charging sources and doesn't know the battery capacity. It seems to be only voltage related.
I'm looking forward to my first full summer with solar in 2021. I'm thinking about keeping a ledger so I can track its performance throughout the months afloat. If I actually follow through with that, I'll share it here on TF.
Attachments


Last edited:
")