Keypower stabilizers seal replacement

The friendliest place on the web for anyone who enjoys boating.
If you have answers, please help by responding to the unanswered posts.

Snapdragon III

Senior Member
Joined
Sep 1, 2016
Messages
457
Location
Anacortes, WA
Vessel Name
Snapdragon
Vessel Make
Custom 56' Skookum trawler
My new boat came with Keypower stabilizers. They were due for a seals replacement, and I was too cheap to pay to have it done, so decided to try and replace them myself. I couldn't find much info on the internet about how to do it, and Keypower doesn't seem to have any documentation on how to do it available, (Their tech support has been very helpful). I figured I would post about my project here, in case anyone else want's to try this in the future.

The cost for the new seals was $139 for both sides. Keypower (Kobelt) Tech support has been great talking me through all my questions on the phone, and getting the parts out to me quickly.

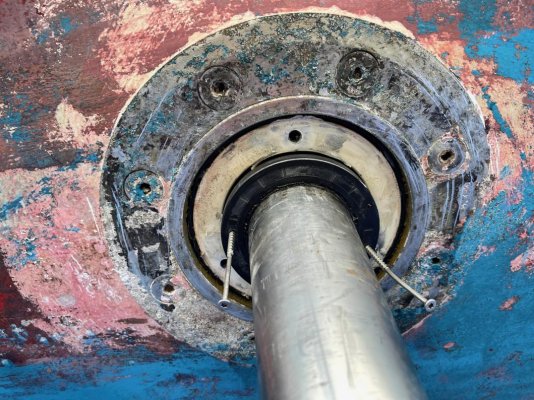
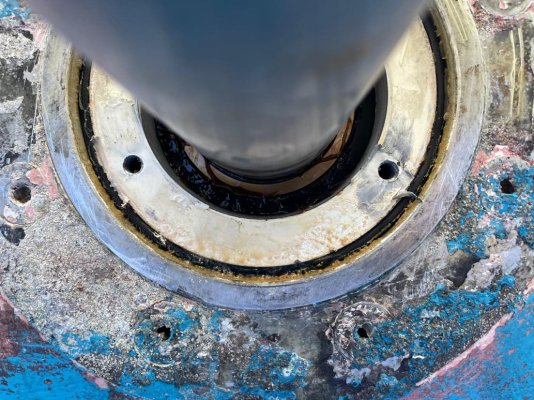
The stabilizers were added to the boat 10 years ago, and I am pretty sure this is the first time the seals have been replaced. They have been all the way from the Pacific NW, to Fiji and back, and were not leaking or having any problems. This was a preventative replacement. There are three layers of seals in the system. There are two spring loaded double lip seals stacked back to back, and then a stainless steel cover plate over the top of them that has an o-ring seal in a machined groove on its inside and outside. I was surprised when I took it apart that the outer o-ring seal had kept it completely sealed the whole time, and the inner double lip seals looked as though they had never seen a drop of salt water. I probably should have just left them and replace the o-rings, but I had it apart so went for it and replaced everything.
 
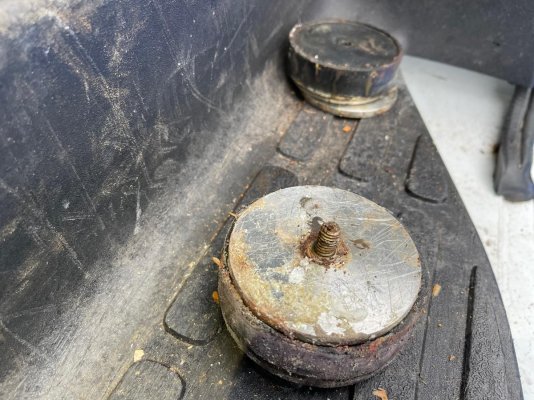
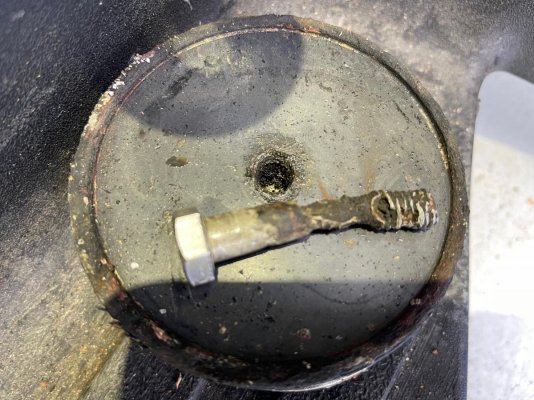
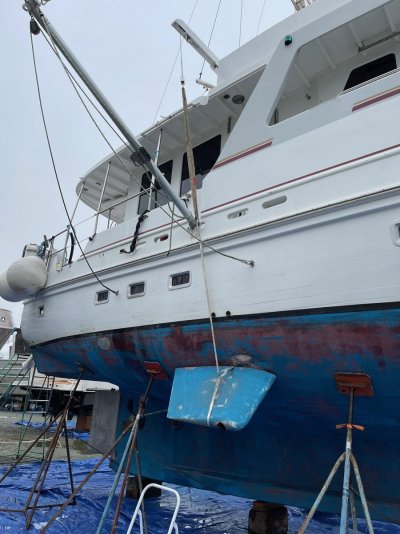
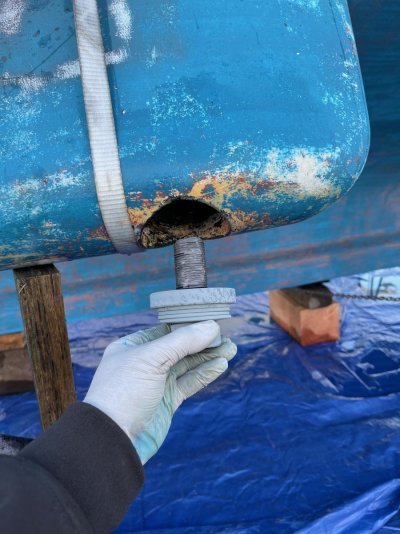
The first step was to remove the rubber compression plugs at the bottom of the fins that seal them, and keep the salt water off the large bolts holding the fins on. The 3/8" bolts in these plugs were super corroded, and were a bit of a pain to loosen, but fortunately I was able to get them without breaking them. Once loose the plugs were still super tight and didn't just fall out. I clamped a pair of Channel locks on the loosened nut and with a lot of pulling and working back and forth, was finally able to get them to come out. They had worked as intended and kept things pretty dry inside the fin. One side had a little bit of moisture in there, but it wasn't too bad.
 

Attachments

  • IMG_0614.jpg
    IMG_0614.jpg
    194.3 KB · Views: 48
  • IMG_0615.jpg
    IMG_0615.jpg
    192.4 KB · Views: 49
  • IMG_0616.jpg
    IMG_0616.jpg
    156.3 KB · Views: 47
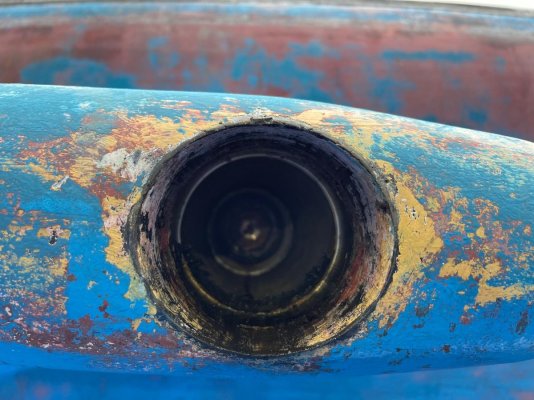
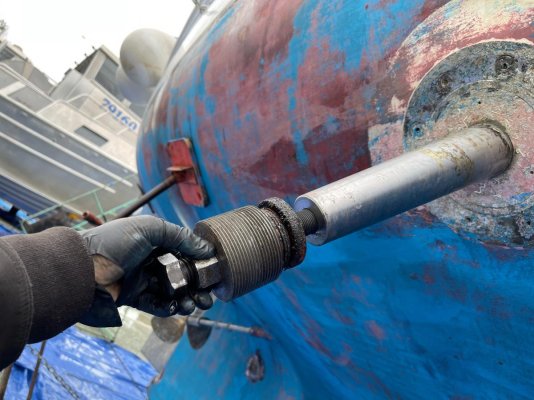
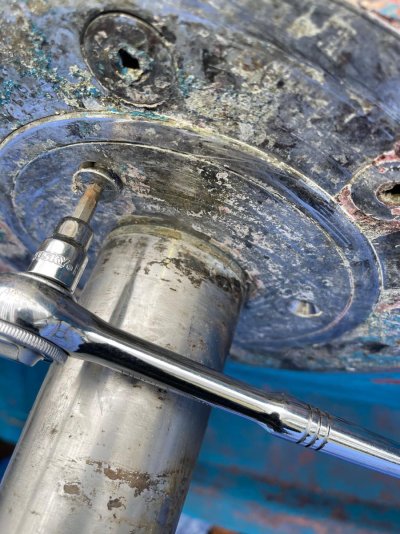
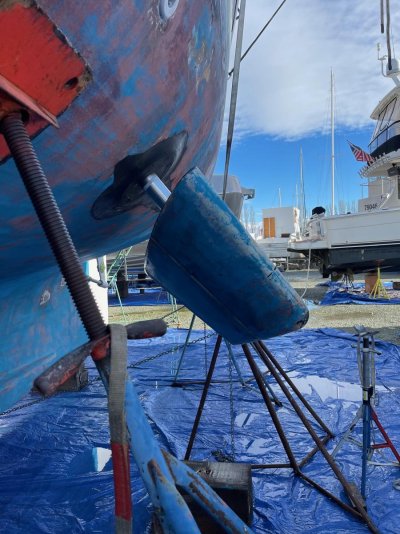
Once the plugs were out, you can access the large bolt that holds the fin on. It is about 8" up there inside the fin. Before wrenching on the bolts you drop the large pins into the actuators inside the boat that locks them at centerline, so you are not wrenching against the hydraulics. The bolt takes a 1 11/16" socket, which fortunately came with the boat. I only had a 1/2" extension and ratchet with a 3/4"-1/2" adapter for the socket. This worked for getting the bolts broken loose with a large piece of pipe over the handle of the socket for more leverage, but had too much flex, for the next step, and I had to go buy a real 3/4" breaker bar, and extension. The fins are a keyless press fit over a tapered shaft. I think they do this so that if you hit something really solid with it, the fin will slip on the shaft. The shaft is a harder metal than she sleeve inside the fin, so it stretches slightly and forms a dry, watertight seal. It was tight! The procedure is you loosen the bolt a few turns, but don't take it out. That way, when the tapered shaft breaks loose, the huge fin doesn't immediately fall off and break your foot. then you screw in the special puller that came with the system. It has an about 2 1/2" threaded outside that threads into the inside of the fin, and a large bolt running through the middle that you tighten and it presses on the head of the loose bolt that holds the fin on, forcing the fin away from the boat, and tapered pin. This puller took a 1 1/2" socket. This system worked good, but it was hard and scary. The fin was on there super tight. I finally ended up with a 5' long pice of steel pipe over my breaker bar and even with that I really had to lean into it hard. I was super afraid I was doing something wrong, and was going to break something. It was stressful, but they both popped loose in the end with a bang, and a startling swinging of the fin from horizontal to vertical. This was the hardest, scariest part of the operation.

I didn't take any pictures of wrenching on the puller as it was a two anded operation, but this picture after the fin was off, shows how the puller pushes the fin away from the pin. The large threads on the puller were screwed into the inside of the fin.
 

Attachments

  • IMG_0619.jpg
    IMG_0619.jpg
    140.1 KB · Views: 70
Last edited:
Once I had the fins popped off the tapered shafts, I had to get them off, and down to the ground. I used some rigging chokers around the fins, and attached to my Steelhead dingy crane. It worked pretty sweet, I was able to take it up tight, remove the bolt at the end of the tapered shaft, then slowly lower the fin off the shaft and down to the ground. The crane has a remote control, so I could control it as I was holding and controlling the fin. The fins are big heavy beasts. I think if you didn't have a crane or something to rig a chain fall to, it would be best to have three people for this operation. Two to hold the fin, while the third guy takes out the bolt, then lower it to the ground.

One other important step I did, but forgot to mention in the previous post was to mark where the ends of the fin fall on the hull when they are centered with the pins in the actuators before popping them loose from the shafts. Since they are unkeyed they need to go back in the same place, but you need marks to make it easy.
 

Attachments

  • IMG_0618.jpg
    IMG_0618.jpg
    140.7 KB · Views: 43
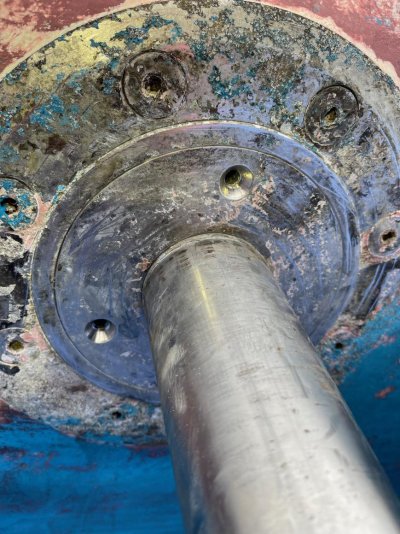
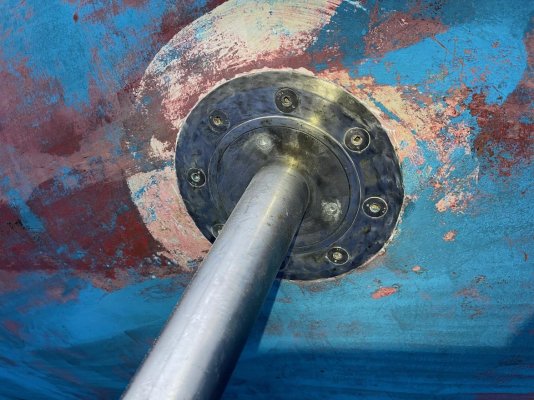
The next step was to remove the stainless plate that covers the seals. It was bolted on with 3 countersunk machine screws (About 3/8", but maybe metric?) that had hex drives. It took some scraping with a pick and a dentist tool to get the barnacle crust, and old bottom paint out of the hex socket. I was really worried that these were going to be totally seized up, but they came right out. They had been put in with some kind of white sealant, that didn't seem too strong. Once I had the bolts out there was no obvious way to get the cover plate out. It was stuck in there flush with the surrounding plate and there was no way to get any leverage on it. I spent a couple hours trying to figure out a way to pry it off, asking the stabilizer rebuild guy at the boatyard I am at (He wasn't familiar with Keypower stabilizers and couldn't figure it out), Leaving a message with Keypower tech support (They did get back to me a few hours later after I had figured it out). Finally I figured out that the cover plate was threaded for a slightly larger bolt, than the smaller bolts that hold it down. by running the larger bolt in it bottoms out, and forces the cover plate up. It was confusing because the smaller hold down bolts look like 3/8" bolts. The cover looked like it might have larger threads in it, but a 1/2" bolt would not fit in there. It turned out it took a bolt that is in between the two in size. I found one that fit in one of my spare parts stashes. The bolt I found that worked looked like it came from one of the Perkins engines from the paint on it's head. I am not sure if it is Metric? Or maybe 7/16"? Once I had the right bolt though I was able to pop the covers right off. The covers have o-rings on their inner and outer edges, and as I mentioned at the top, they seemed to have been completely watertight for 10 years 13,000+ miles. I was pretty impressed.
 

Attachments

  • IMG_0621.jpg
    IMG_0621.jpg
    192.7 KB · Views: 42
  • IMG_0622.jpg
    IMG_0622.jpg
    196.9 KB · Views: 47
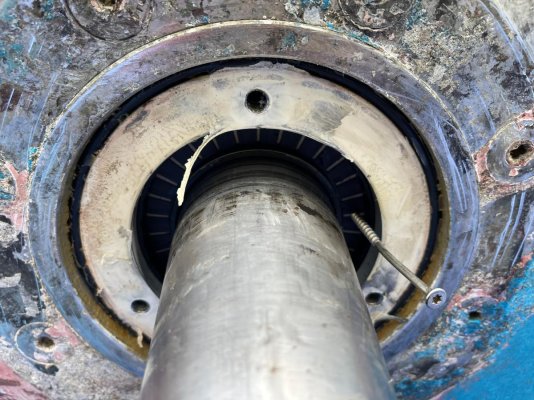
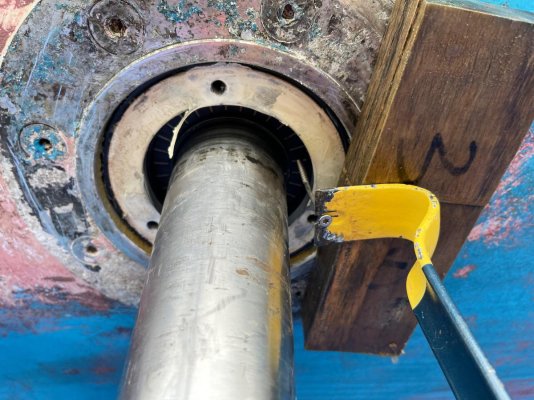
Once the cover plates were off I could see the first of the double lip seals. To get them out, I drilled a small hole in the middle of them and drove in a long deck screw, then used a block and a pry bar to pry it out. They came out without too much fight, and I didn't scratch up the shafts, or stabilizer body. Once the two lip seals were out, you could see the large bearing behind them.
 

Attachments

  • IMG_0623.jpg
    IMG_0623.jpg
    202.3 KB · Views: 51
  • IMG_0627.jpg
    IMG_0627.jpg
    191.8 KB · Views: 53
  • IMG_0628.jpg
    IMG_0628.jpg
    166.6 KB · Views: 49
  • IMG_0630.jpg
    IMG_0630.jpg
    199.8 KB · Views: 54
The next step was to clean everything up, spread a bunch of new grease around, and put in the new seals. I used a plastic headed hammer, and some wood blocks that could fit inside, and ontop of the seals to gently tap the new seals in. They went in without too much fight since I greased them up. It was really nice having a plastic hammer so you could use it right at the side of the tapered shaft without worrying about scratching or denting the shaft. I then cleaned, greased, installed new o-rings in the cover plates, then reinstalled them. For the machine screws in the cover plates I used lots of Tefgel, and a little butyl tape wrapped between the head and the cover plate. I didn't get any pictures of this part because my hands were super greasy, and I didn't want to touch my phone. After I had it all back together I cleaned up the body of the stabilizer around the cover plates. The boat yard is recommending to not try and epoxy coat this part, since it makes it too hard to disassemble later. They recommend some Pettit spray can product that is meant for running gear antifouling. I will double check with Keypower tech support, but that is the plan for now. I am having the yard do the bottom painting, and they have already put the first coat of paint on the inside edge of the fin, and the hard to get to part of the hull under the fin. I am hoping to get one more coat on tomorrow morning, then get the fins back on the boat by the end of the day. I am waiting on an email from Keypower tech support for the proper torque spec for the bolt that holds the fin on. When I get that I will need go get my hands on a huge 3/4" torque wrench.

I hope this thread is helpful for people considering DIY stabilizer work. I had looked around and couldn't find much out there, except a lot of references to people spending a lot of money to have someone else do it. I was seeing talk of $2,500 every 5 years. Let me tell you, $140 every 10 years sounds a lot better to me. It took me about 12-13 hours so far, and will probably be a few more hours to get the fins on. I think if I were to do it again right now, while I remember how to do it, and don't have to run around trying to find 3/4". breaker bars, I could do it in a single 8 hour day. I am impressed with the Keypower system. It seems well designed and built. The tech support has been great, but it would be nice if they had good illustrated instructions for seal replacement on their web site, or that tech support could just email you.
 

Attachments

  • IMG_0633.jpg
    IMG_0633.jpg
    196.3 KB · Views: 47
Last edited:
That was a really good tutorial. Thanks.
 
Thanks for your effort in posting your experience with this project. Its post like these that make a forum really invaluable and this information will be available for others for years.
 
Thanks for the very informative post!
 
Snapdragon, thanks for a very interesting post and tutorial. I am curious about your boat, years ago I spent months reading the cruising logs of a Skookum called Sea Raven online. Are you aware of that boat or blog, and, is your boat similar?
Regards,
Scott
 
Snapdragon, thanks for a very interesting post and tutorial. I am curious about your boat, years ago I spent months reading the cruising logs of a Skookum called Sea Raven online. Are you aware of that boat or blog, and, is your boat similar?
Regards,
Scott

I am not aware of the Sea Raven. The story I heard about my boat was that the original people who built it bought the Skookum mold which had been sitting for 10+ years in a lot in Port Townsend, after the original builder had gone bust, and built my boat as a custom one off Trawler. It was originally built as a power boat, and had a poorly designed sailing rig added to it many years later. It has a lot of miles under its keel for a power boat. I believe it has been through the Panama canal and cruised for years in the Caribbean, Eastern Seaboard, South America, then back to Seattle. Then another trip in the early 2000 with the second owner from Vancouver to New Zealand and back. Then a third trip From Vancouver to Mexico, to Fiji, where I bought it. From Fiji, I brought it back to Hawaii, then Anacortes WA.
 
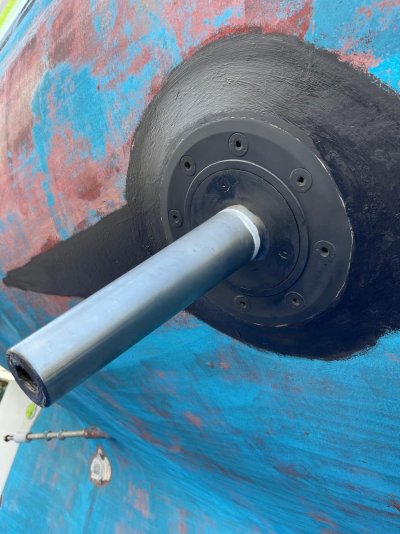
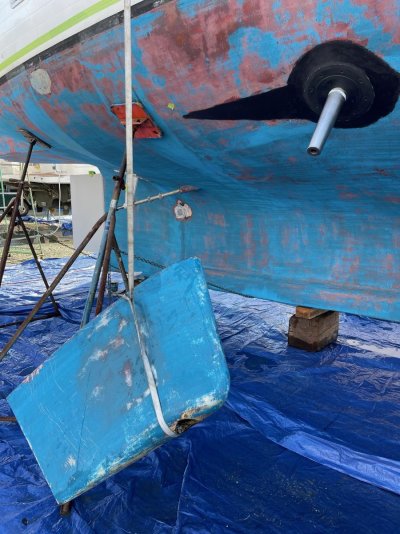
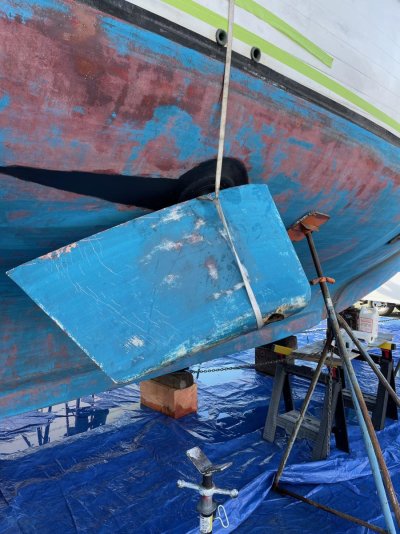
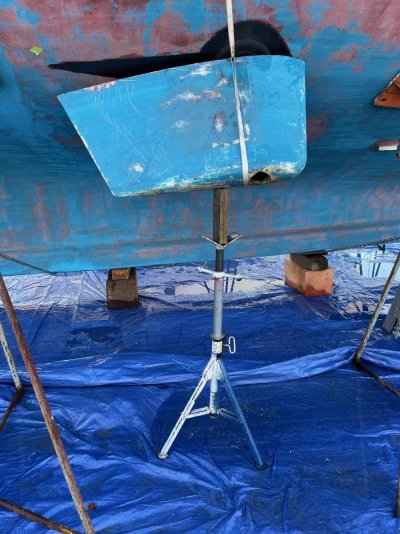
The bottom painter got the backs of the fins, and the hard to reach areas on the boat painted today, so I was able to get the fins back on the boat. I used the same rigging set up I used to get them off with the dingy crane, and they went on very easily. First I cleaned up the pins, and inside of the fins as best I could with Acetone. The explicit instructions were to put them together dry, but I just couldn't help myself and put a small strip on Tefgel at the top of the pin to try and seal any salt water from creeping in. You can see it in the first picture. Hopefully this will not cause a disaster. The bolts and washers that hold the fin onto the fin had some minor rust on them so I cleaned them up yesterday, and gave them a coat of cold galv. Once I got the fins back on the pins, and the bolts in loosely, I used a jack stand, which was about 12" too short, and a scrap of wood to extend it, to jack the fin up horizontal to match the marks I made for alignment. Once it was where I wanted it, I snugged down the bolts and they are on. The last step I haven't done yet is to torque them to 400 ft lb. I needed a 10" long 3/4" extension. I ordered one on Amazon and it was waiting for me when I got home this evening, so I will torque them tomorrow, install the compression plugs, and it will be done.
 

Attachments

  • IMG_0636.jpg
    IMG_0636.jpg
    149.3 KB · Views: 47
  • IMG_0638.jpg
    IMG_0638.jpg
    183.5 KB · Views: 44
  • IMG_0639.jpg
    IMG_0639.jpg
    187.5 KB · Views: 48
  • IMG_0640.jpg
    IMG_0640.jpg
    188.9 KB · Views: 36
  • IMG_0641.jpg
    IMG_0641.jpg
    151 KB · Views: 43
  • IMG_0642.jpg
    IMG_0642.jpg
    180.1 KB · Views: 42
The bottom painter got the backs of the fins, and the hard to reach areas on the boat painted today, so I was able to get the fins back on the boat. I used the same rigging set up I used to get them off with the dingy crane, and they went on very easily. First I cleaned up the pins, and inside of the fins as best I could with Acetone. The explicit instructions were to put them together dry, but I just couldn't help myself and put a small strip on Tefgel at the top of the pin to try and seal any salt water from creeping in. You can see it in the first picture. Hopefully this will not cause a disaster. The bolts and washers that hold the fin onto the fin had some minor rust on them so I cleaned them up yesterday, and gave them a coat of cold galv. Once I got the fins back on the pins, and the bolts in loosely, I used a jack stand, which was about 12" too short, and a scrap of wood to extend it, to jack the fin up horizontal to match the marks I made for alignment. Once it was where I wanted it, I snugged down the bolts and they are on. The last step I haven't done yet is to torque them to 400 ft lb. I needed a 10" long 3/4" extension. I ordered one on Amazon and it was waiting for me when I got home this evening, so I will torque them tomorrow, install the compression plugs, and it will be done.
Hello Snapdragon,
I would like also to thank you very much for this tuto. It will definetly help me here in Europe to organize the next maintenance of my Keypower Stabs. May I ask you the ref of the seals you have ordered before I contact Keypower in BC?
 

Latest posts

Back
Top Bottom