Grand Banks 42 Swim Step / Water Tank Help!

The friendliest place on the web for anyone who enjoys boating.
If you have answers, please help by responding to the unanswered posts.

RyanZ

Member
Joined
Oct 1, 2016
Messages
13
Location
United States
Vessel Name
Trawler Bills
Vessel Make
1980 Grandbanks 42 Classic
Hey All-

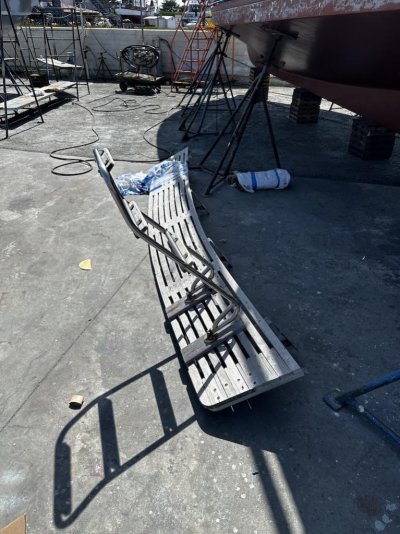
I'm in a little bit of a quandary: We have a 1980's Grand Banks 42 and this last summer we had a friend onboard that used the port swim step somewhat like a springboard and snapped the top of the bronze bracket on there and we are in need of fixing it.

We are due for a haul out this year, which I'm going to take the opportunity to fix it, and my thought was to upgrade the entire platform while we were at it, as the depth of the platform leaves a lot to be desired.

I did some searching on TF and found the recommendation for Butler Marine and have contacted them and they are ready to make us up a new one along with corresponding SS brackets.

We got to the topic of backing plates and I started to get a little nervous as I know the water tanks can be virtually impossible to remove without cutting one up which we really want to avoid. In fact if we had to do that I would just braze our old step back together and reinforce.

I went down to the boat and I have about 2' of access to the transom on either side of the water tanks and I can see where the backing plates should be ( they are right next to the exhaust) and there are no backing plates just fiber glass. So my assumption would be Grand Banks Glassed in backing plates? I can't image there are just two Studs/Bolts glassed in holding everything up. Because my thought was to use the existing bolts for the new brackets.

In talking with the yard they are pretty adamant about the new brackets being backed up with backing plates.

So I guess my questions are:
Does anyone know if the GB's had backing plates glassed into the transom? If so OK to used existing studs/bolts?

Has anyone been able to remove the water tanks without cutting them up? I have 2 Not 3.

Has anyone been able to clear everything out of the lazarette and tip their water tanks forward? I'm hoping that could be a solution, all we need is a little bit of clearance to access the transom, and like I said before we can get to the furthest most port and starboard with the tanks in as is.

Any ideas on any other ways to mount this thing?

Any comments thought's or suggestions/advice would be very helpful.

I can still back out of the swim platform build, and I really don't want to find myself stuck with one that I can not install.

Thanks!

RZ-
 
Last edited:
I feel your pain, I just redid my backing for my platform brackets on my Marine Trader.

I had 1\2" plywood backing with pan head machine screws going from inboard to outboard and then glassed over. My two outermost backing blocks had rot and another one was split. Luckily I was able to remove my water tanks.

One thing that could give you a hint is first check to see if you can tighten and or loosen any of the hardware. That could give you an indication that the bolts are still embedded properly.
 
CharlieO

I checked the bolts recently and the nuts will backdown on the bolt without spinning the bolt, so I think we are in good shape there. No signs of rot anywhere in or outside.

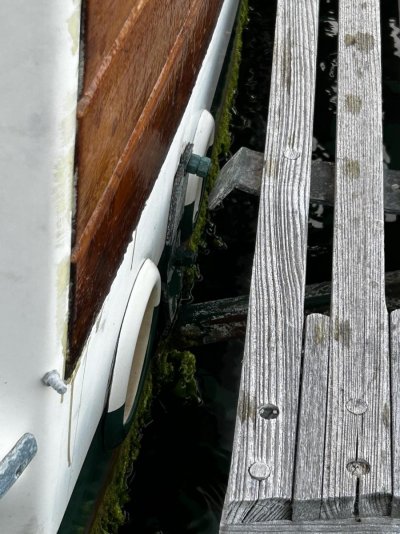
It Sheared at the top bolt hole.

Attached is a picture (not the best one)
 

Attachments

  • Swim Step Bolt.jpg
    Swim Step Bolt.jpg
    183 KB · Views: 80
Butler does a great build and Micheal has a lot of experience and good advice. We extended the swim step on our GB42 Motor yacht, the new one is thicker stock than the too narrow original. Ours is a 1992 and the backing plates are glassed in, but easy to see their thickened size, with the through bolts.
 
If you can’t see a bulge then there probably isn’t any backing material. I don’t like plywood but rather something like 1/4” aluminum or G10 fiberglass. I also like to bed the plates in thickened epoxy to take into account any high spots in the hull. I absolutely would use backing plates.
 
Cap Steve & Como Dave-

Thanks for the info, I didn't see a bulge when I was back there and there definitely aren't any through bolt heads that i can see. I'm going down in the next couple of days and will look again and gets some pictures of the inside.

The thought that came to me was to have stainless steel backing plates made, have the bolts welded to the backing plate at the correct spacing, and then I can push that trough from the inside transom side to out and I'm pretty confident i can get that into the correct position without moving the tanks, which would help eliminate the need to back them up while tightening.

We will see if Mike can connect me with anyone that has our vintage boat that has done this.

I'll keep posting as I find out more.

RZ-
 
I put an extended swim platform on a year ago on our current boat. I didn’t have access to the bottom of the support down rods where they would bolt through the transom. The swim platform extension overlaid the factory platform and that was molded into the hull. So the top of the extension was well supported by sitting on the factory platform. But I was concerned about making the support down rods very solid. Since the new swim platform was 5’3” deep fore and aft it would need solid support. I had a machine shop make 4 4” diameter discs out of 316 1/4” S/S. I had them drill 2 1/4” countersunk holes from the forward side. I then put in 1/4” flat head bolts in from the front side and put nuts on them to make them into studs. The spacing was determined by the holes in the support rods. I also had them drill 8 holes for #12 sheet metal screws in the perimeter of the discs. I attached the discs to the transom with 5200 and the 8 #12 screws. Then I had 8 studs to attach the support rods to.

Not sure I would do the upper bolts this way but maybe you can figure a way to get to them for through bolts with a backing plate. So far mine has worked fine.
 
When I built a new, extended swim grid, I found the old, bronze supports were inadequate to support the added loads, so I took them all off and installed new SS supports. When removing the bolts I found several of those below the waterline to have corroded away, from maybe a 5/16" original to a 1/8" hopeless.
Not being a GB, I had different access issues, so I can't help you with that. I did note that my originals were backed up with fender washers, and showed no signs of weakness at that point. My fabricator also recommended fender washers, so I went ahead with those. I eliminated all through bolting below the waterline, that end of the supports being in compression.
Now almost 20 years in, everything is still like new. That grid has supported some heavy loads.

I still have 4 of the original bronze supports. I used one to make hooks for my boarding ladder.
 
I'm not trying to be argumentative here, but...... You sought out a yard because they were the best, and now you want to second guess their approach. Would you tell your doctor that you think you can get a few more miles out of your apendix, or that a pacemaker is overkill ?
 
One good thing, you are working with a competent yard. Lots of lessor yards would just run a screw into the transom and call it good.

pete
 
Commodave:
Do you have any pictures of that? Sounds Pretty robust.

Koliver:
Yeah our Bronze ones are defiantly showing their age, fortunately for us all brackets mount above the water line. Ideally I'd like to get good sized backing plates on there, but fender washers could be an option for the center brackets if I can't get those tanks out.

Benthic2:
I'm not questioning if we need backing plates or not, I agree with the yard that we would need those, and I would feel a lot better with them in there. What I would not feel good about hacking up a perfectly good tank just to put them in, and likely spending several boat bucks to do so on top of coming up with a new tank system. In that case I would probably braze and reinforce the original and admit defeat we don't need an extention that bad. My question really gets down to the fact about any creative solutions on how to do it on a GB with the tanks in place, as well as if anyone knows if plates were glassed in there. At this moment from what others have said and my assumption is that they were most likely glassed in, however its a question on if its just plywood, which per Commo Dave and Capt Steve looks like I can identity with another visit and inspection. Having said that I would still operate under the assumption that there are NO backing plates and we need to proceed with them if we are to do the install properly. As stated above of the 4 brackets I can clearly access two so those are no problem and will have plates, now it comes to creative thinking on how to access the other two without chopping up a water tank. Apologies if that wasn't clear before.

Pete:
Yeah this yard has come highly recommended from several commercial fishermen friends and two other YC members in our area, and had the response been yeah lets just lag it in there I would have had pause. What I was hoping instead of "you need backing plates or we won't install" was: "Oh yeah you need backing plates those tanks are a PIA but we have this solution to do it and have done this on another GB." Either way I'm going down tomorrow to meet with them and I'm hoping we can sketch something up.

Thanks all for the support and I'll keep posted as I learn more. Haul out is 5/29
 
Not sure who installed the original platform. If it was GB I would be willing to bet there is plenty of reinforcement in there. I would think the yard will know if there is reinforcement in place when the remove the old brackets. Please be sure to post your final solution / results.
Good luck!
 
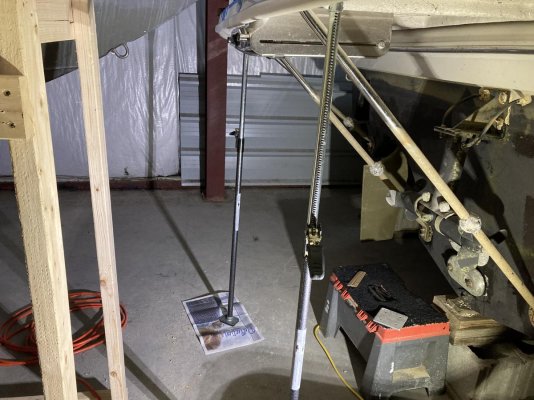
I thought I had taken some photos of the discs, but alas I apparently didn’t. I found a photo from this winter when I was installing the staple on the swim platform. If you zoom in closely at the support rods where they attach to the transom you can sorta see one of them. I would take a better photo but we have already launched this year. Ignore the 2 vertical ratchet rods, they are just holding up the G10 fiberglass backing plates for the staple while the epoxy sets up.
 

Attachments

  • 21A38FC3-44FD-4EC4-9318-3E8FE5E7D9AD.jpg
    21A38FC3-44FD-4EC4-9318-3E8FE5E7D9AD.jpg
    160.7 KB · Views: 61
Any ideas on any other ways to mount this thing?

Any comments thought's or suggestions/advice would be very helpful.

I can still back out of the swim platform build, and I really don't want to find myself stuck with one that I can not install.

Thanks!

RZ-

Sorry, I cannot think of a way to do this without moving the tanks. I would think there are nuts and washers attached to the bolts and these will drop when you take out the bolts.

But if you ask for my advice, fix what you have, keep it original and keep your boat bucks for the many other projects that come up.
 
Last edited:
All-

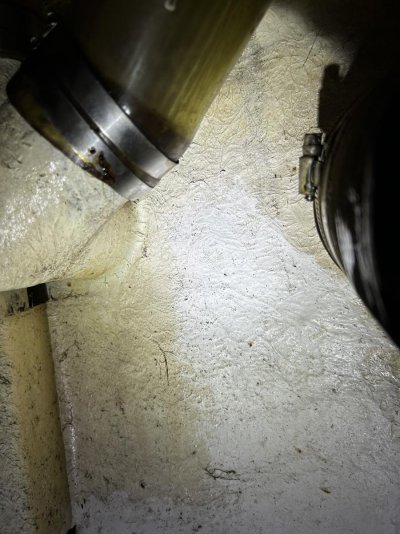
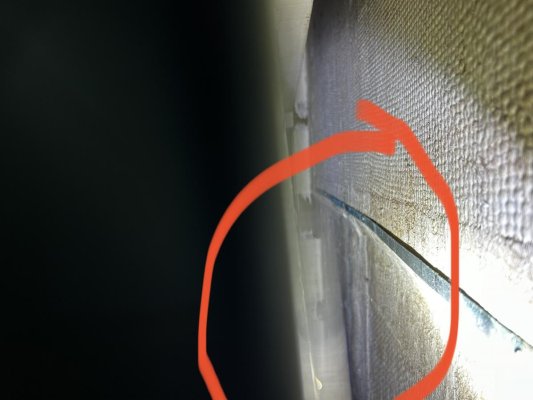
Went down to the boat today, attached are the pictures of the glassed in backing plates.

Picture # 1
So port and starboard its easy to locate the bolts for the bracket are in between the scupper and exhaust ports: I can feel a slight rase however its not obvious, no bolt heads located.

Picture #2
Then on the middle brackets not a great picture but you can see there is definitely something glassed over in there.

On further inspection there is absolutely no way the tanks can get moved without cutting them out: there is only 3" of clearance all the way around various boat parts are in the way: Rudder, Rudder Gear, various hull indentations etc.

However I have direct access to the furthest port and starboard bolts, and via this I could see potentially getting a bolt on the end of a long throw device and potentially getting a bolt to back up on a new backing plate but it would definitely be the longest game of "claw" ever.

Current thinking is to use beefy new backing plates on the two port and starboard mounts I can access, and utilize the existing glassed in bolts / plates for the ones I can't access. Comments ensue

Will advise what the yard says.

RZ-
 

Attachments

  • Port Bracket Location.jpg
    Port Bracket Location.jpg
    172 KB · Views: 49
  • Middle Port Bracket.jpg
    Middle Port Bracket.jpg
    86.8 KB · Views: 56
That may be the best you can do. Too bad boatbuilders do plan on maintenance when they build boats…
 
It’s unlikely, but easy to ask so here goes:
Is there a chance you could temporarily shift the tanks outboard enough to get a gap between them wide enough to fit in a third set of bolts and backing plates in the center between the tanks? This would reduce the load on the existing bolts.
 
If you have enough clearance to slip a bolt in from the inside that will reach thru the transom then you can do it. Drill the holes thru from the outside. Use one of the extended vice grips ( I have seen these up to 2 feet long and it would be easy to weld on extensions to make it longer) to grasp a bolt head. Put the backer plate on the bolt and smear liberally with 5200. Put the bolt thru the hole and bolt on a plate on the outside that has a stud welded on it facing outward. Have done similar things on my boat. Another possibility if you can only get at the two ends is to make a very stout exterior frame that is only secured at each end. It can be done but you will need to get inventive.
 
GB Swim Platform

Ryanz,
Although we have a 36' GB Classic, our swim platform is original. The brackets are bolted on with double nuts on the exterior....that would indicate to me that Grand Banks installed backing plates with welded studs or bolts inbedded into the fiberglass. Should be able to back off the nuts and reuse what you have.

We have a friend that lost his 42' GB Classic in Ian but had just had a new platform installed, weeks prior. If you PM me I will give you his contact info so you could find out from him how it went for him.

Best
Mike Dana
Third Reef
36' Grand Banks Classic #819
Potts Harbor Maine (South Harpswell)
 
My 1973 GB36 has studs protruding fro the transom for the SP brackets. There is nothing visible in the lazzarette as far as backing plates. They must be embedded in the transom which seems to have a plywood core. I did cut out one of the tanks to remove both(nothing to do with SP). The alternative I see for tank removal is to remove the exhaust hose on one side to allow the tank to be slid over far enough to remove the second and then slide the first one back to remove. Cutting the tank seemed easier to me (still not easy even with a plasma cutter) as I planned to replace the tanks anyhow.
 
All-

I wanted to close the loop here as the boat is out of the yard and back in the slip.

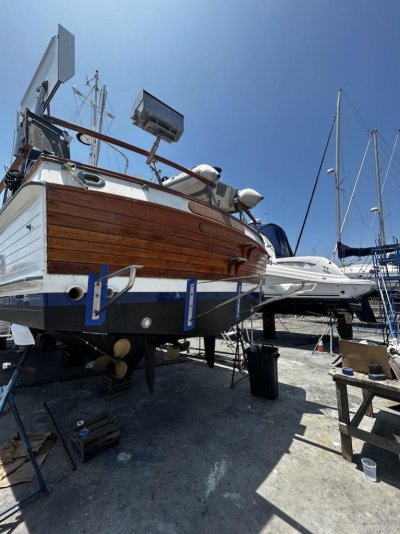
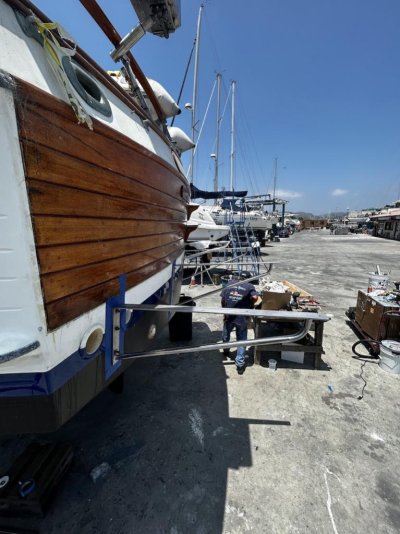
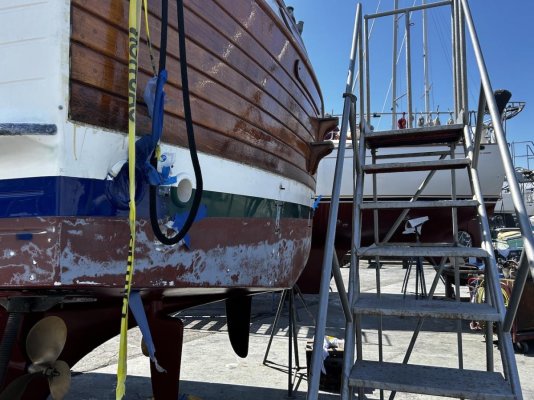
We ended up going with Butler Marine for the Brackets and the swim step.

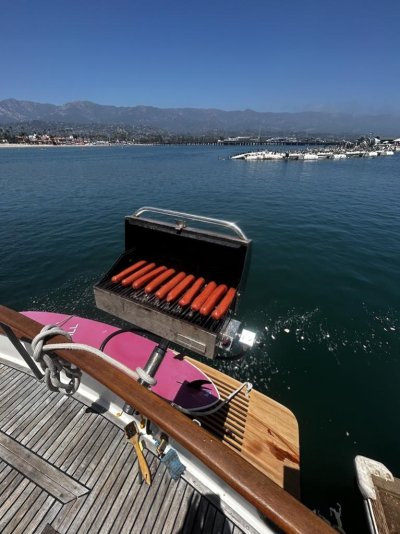
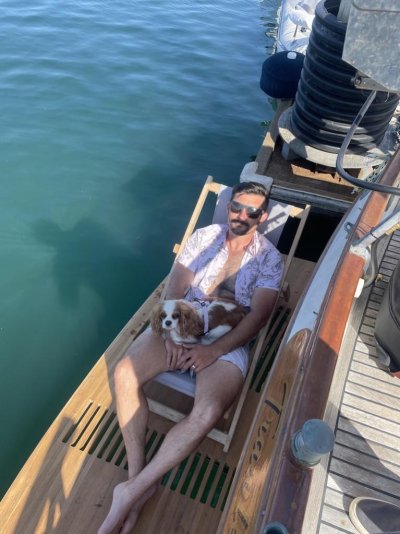
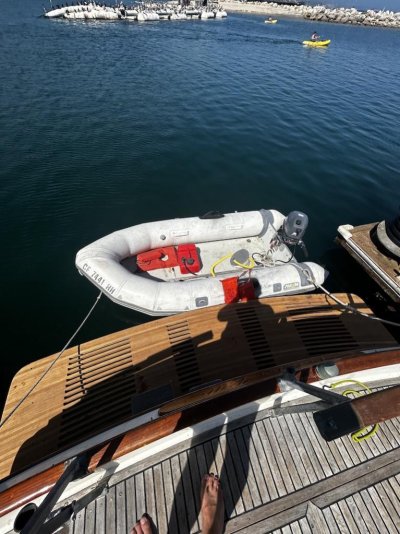
They did amazing work the Brackets were extremely stout much better than the OEM construction. The new teak Swim Step is gorgeous and is much more functional than the old one. Only issue was lead time, Ordered April 1st and we got the Swim Step July 3rd. Fortunately I was able to get the brackets sooner and we put them on in the yard. We had the swim step shipped to the Santa Barbra Harbor and then used the boat to pick it up at the curtesy dock. Then it was a just a matter of mounting it and putting a snorkle on and getting wet to drill some holes and fasten some bolts.

The old bracket and nuts came off very easily and it was essentially a direct replacement. Upon further inspection the previous bolts did have backings glassed into the hull so we were OK there. Yard and I agreed it was a matter of the bolts taking sheer and some outward pressure but due to the construction of the new brackets they put most of the pressure on the transom.

All in all it worked out well apart from not being able to install the swim step in the yard.

I also took the time to do do the following while I was hauled out:
  1. Compounded & Polished & Waxed the Hull Sides and the entire boat
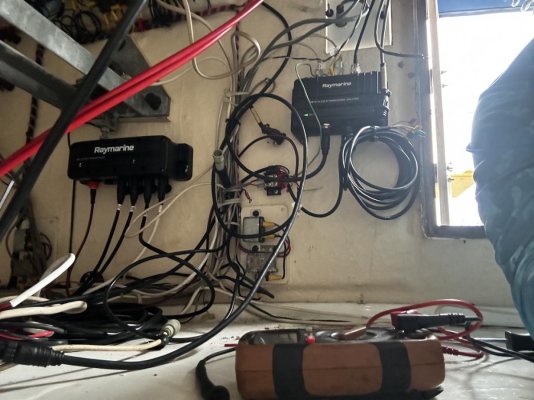
  2. Set up a Raymarine HS5 Net work
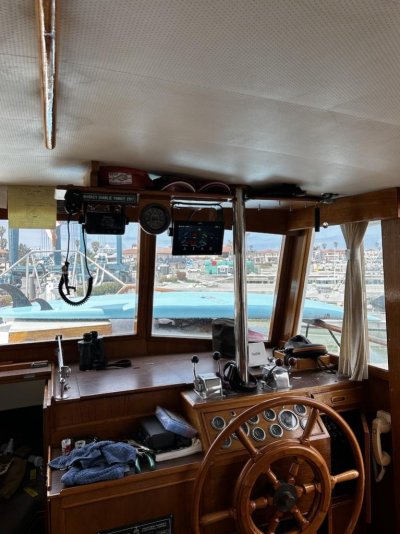
  3. Added an Axiom 9+ to the lower helm station (Replaced the vintage 90s Sitex)
  4. Added an Axiom 12+ to the flybridge (replaced the old e series MFD)
  5. Added Raymarine RV-200 P&S Transducers
  6. Replaced the Vintage 90' broken Sitex Radar to A Raymarine Quantum
  7. Added an AIS Tracker
  8. Replaced Both vintage 80's VHF Antenna
  9. Replaced the Windscreen on the Upper Helm station
  10. Replaced non functioning depth meter with a new Raymarine i50
  11. Upgraded the lower Helm VHF to include DSC
  12. Routed Propane hose from the Fly Bridge Propane locker to the Stove in the galley (solid run) and to the Stern for the HotTap and the BBQ
  13. Installed a Trident Propane Sniffer and remote on off switch
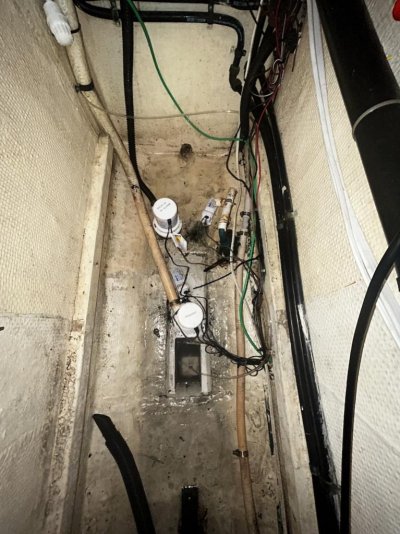
  14. Cleaned up some really poor bilge wiring and created a lower bilge pump for normal use and an upper bilge with a high alarm as the back up / alarm.
  15. Installed a SeaFlow Dry Bilge and got rid of the derelict and non working 2 manual bilge pumps. (bilge is always super dry now :socool:)
  16. (got rid of /cleaned up a bunch of derelict wiring and components)
  17. Installed a hose spigot on the stern for the HotTap
  18. Installed a thru hull for the Espar Heater we are going to get
  19. ReBonded the Entire Boat
  20. Installed Transom Lumitec Underwater Lights
  21. Installed Lumitech Typhoon Lights mounted under the boat
  22. Installed Curiosity Lights Lower and Upper
  23. Installed a Poco 3 Switch on the Network for MFD light control
  24. Networked the Fusion Deck for MFD control
  25. Installed two speakers on the Forward deck
  26. Installed a New bait tank / salt water wash down
  27. Yard removed and glassed all non used sea water head system valves (4)

^ If anyone has any questions about the swim platform or any of the work happy to help it was a pretty easy DIY.
 

Attachments

  • New Brackets.jpg
    New Brackets.jpg
    107.6 KB · Views: 60
  • New Brackets 2.jpg
    New Brackets 2.jpg
    114.8 KB · Views: 49
  • Old Swim Step.jpg
    Old Swim Step.jpg
    139.1 KB · Views: 47
  • Removed Transom.jpg
    Removed Transom.jpg
    175.6 KB · Views: 60
  • Swim Platform 1.jpg
    Swim Platform 1.jpg
    113.3 KB · Views: 47
  • Swim Platfom 3.jpg
    Swim Platfom 3.jpg
    99.9 KB · Views: 53
  • Swim Platform 2.jpg
    Swim Platform 2.jpg
    135 KB · Views: 50
  • New Lower Helm.jpg
    New Lower Helm.jpg
    117.2 KB · Views: 47
  • New Network.jpg
    New Network.jpg
    125.8 KB · Views: 51
  • Clean Bilge.jpg
    Clean Bilge.jpg
    131.8 KB · Views: 43
Back
Top Bottom